free shipping at $99


When you're learning how to burn a candle properly, that very first light is everything. It's the moment that dictates how your candle will perform for the rest of its life.
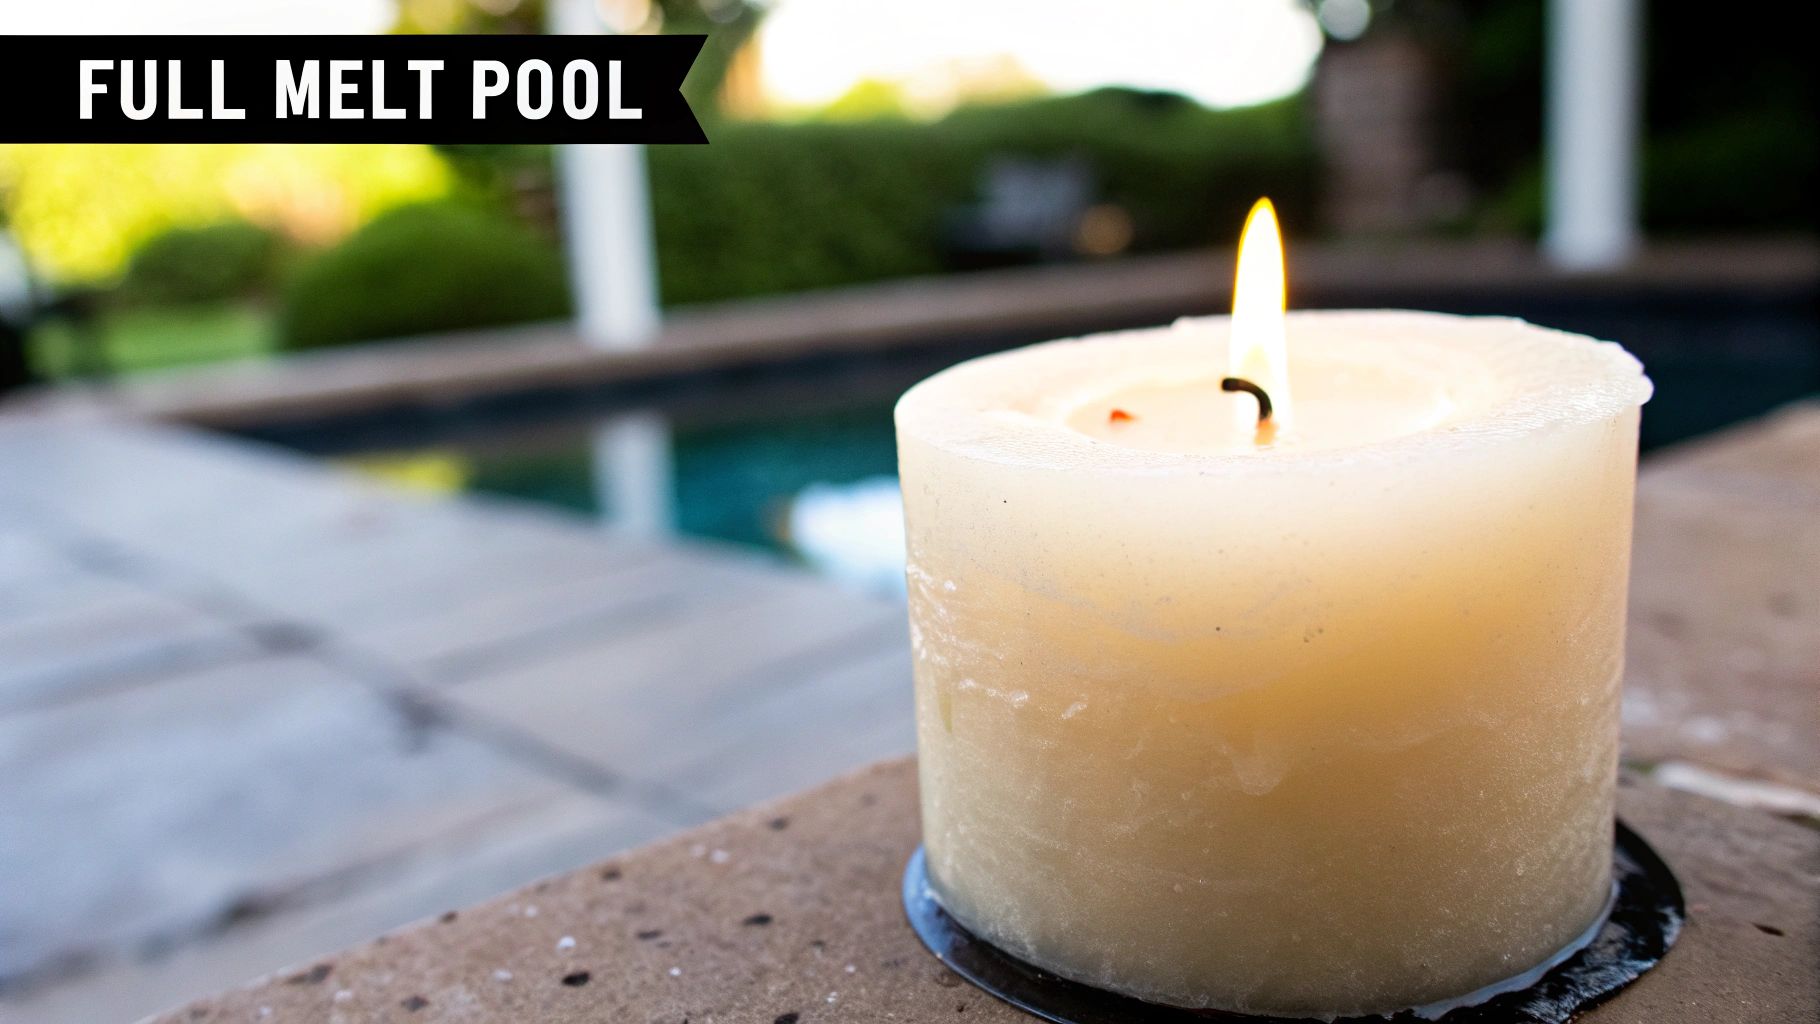
To avoid a super common and frustrating problem called tunneling, you have to let that top layer of wax melt completely, all the way to the edges of the container. This simple, patient step sets the "memory" for every single burn that follows.
That first burn is about so much more than just setting a nice mood. It's when you establish your candle's wax memory. By letting the wax melt into a full, even liquid pool across the entire surface, you're essentially teaching the candle how it should burn from now on.
If you blow it out too early, the candle remembers that smaller wax pool. On the next light, it will only burn down in that same small circle, leaving a thick, wasteful ring of hard wax along the sides of the jar. That's tunneling, and it's the fastest way to ruin a good candle.
The golden rule here is pretty simple: plan to burn your candle for one hour for every inch of its diameter.
So, for a typical 3-inch wide candle, you'll want to let it burn for about three hours the first time you light it. This gives the flame enough time to melt the wax all the way to the edges. Trust me, this step is non-negotiable if you want to get the most out of your candle. Skipping it can waste up to 50% of the wax!
This handy visual shows you exactly what a perfect burn cycle looks like.
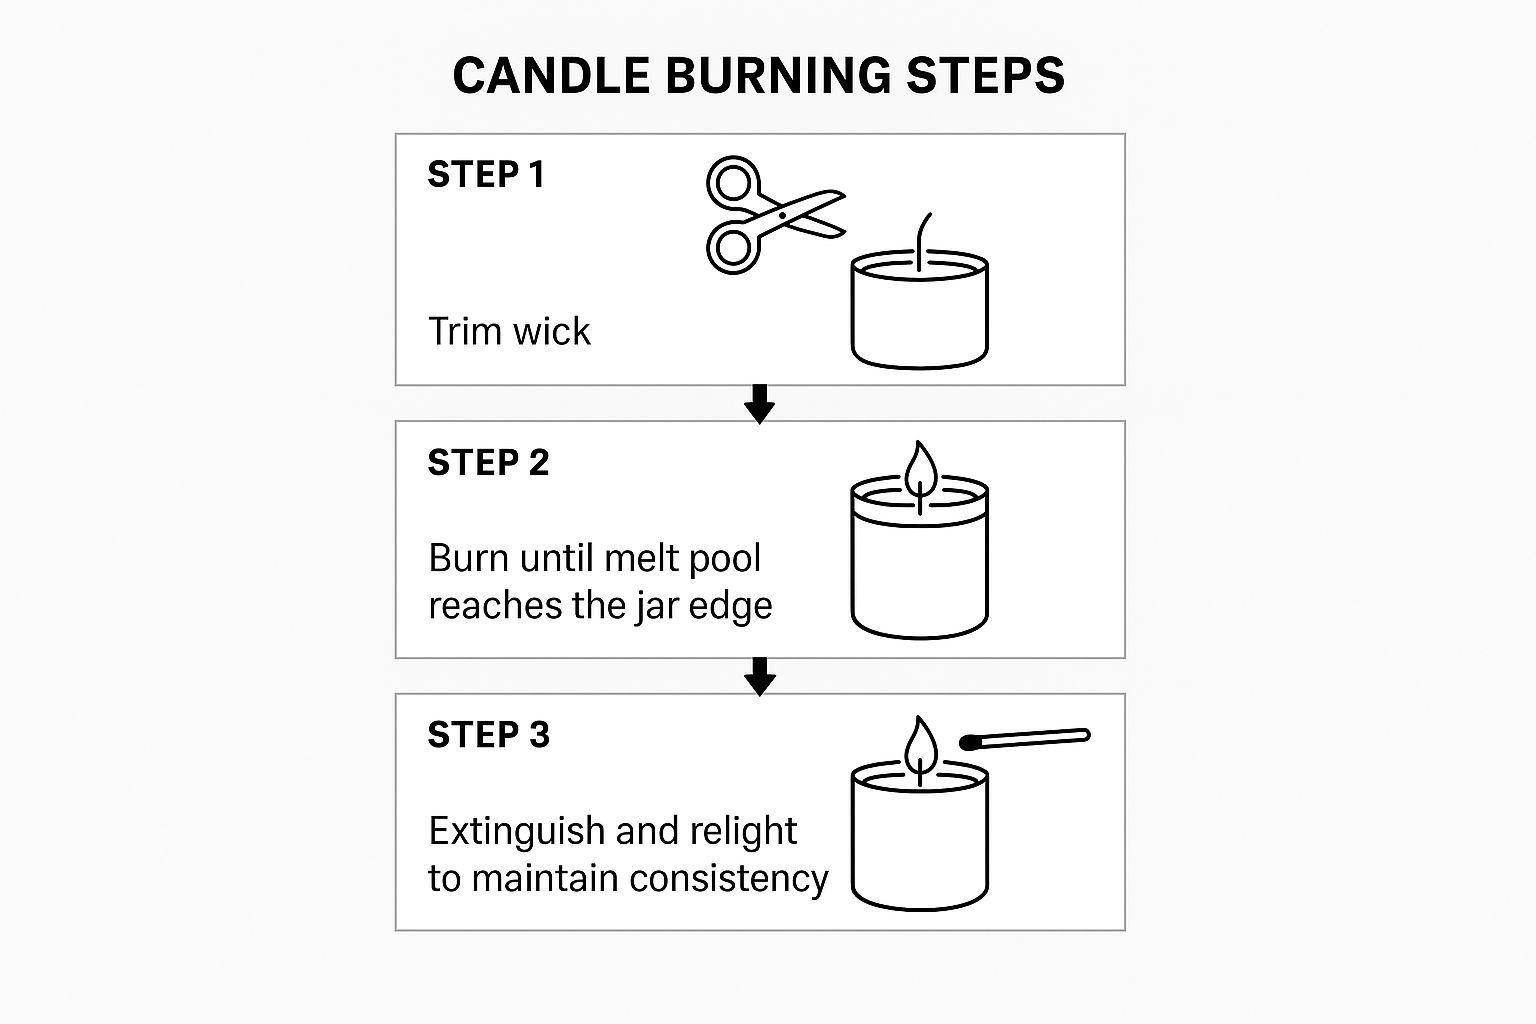
As you can see, getting that full melt pool is the most important part of the process, right between trimming your wick before you start and safely putting it out when you're done.
The biggest mistake I see people make is not letting their candle burn long enough the first time. This one little error is behind almost every bad case of tunneling.
Once tunneling starts, it's a real pain to fix. That's why putting in the time for that first burn is so critical. By following this one guideline, you'll get the best possible fragrance and use every last bit of wax.
And hey, if you already have a candle that's started to tunnel, don't throw it out just yet! We have a guide on how to prevent and fix candle tunneling with a few easy tricks.
To make it even easier, here's a quick reference table. Use it to prevent tunneling by making sure your candle's first burn is long enough to create that all-important full melt pool.
| Candle Diameter | Recommended Minimum Burn Time |
|---|---|
| 2 inches | 2 hours |
| 3 inches | 3 hours |
| 4 inches | 4 hours |
| 5 inches | 5 hours |
Just measure your candle's width and you'll know exactly how long to let it glow. A little patience upfront pays off with a longer-lasting, better-smelling candle experience.
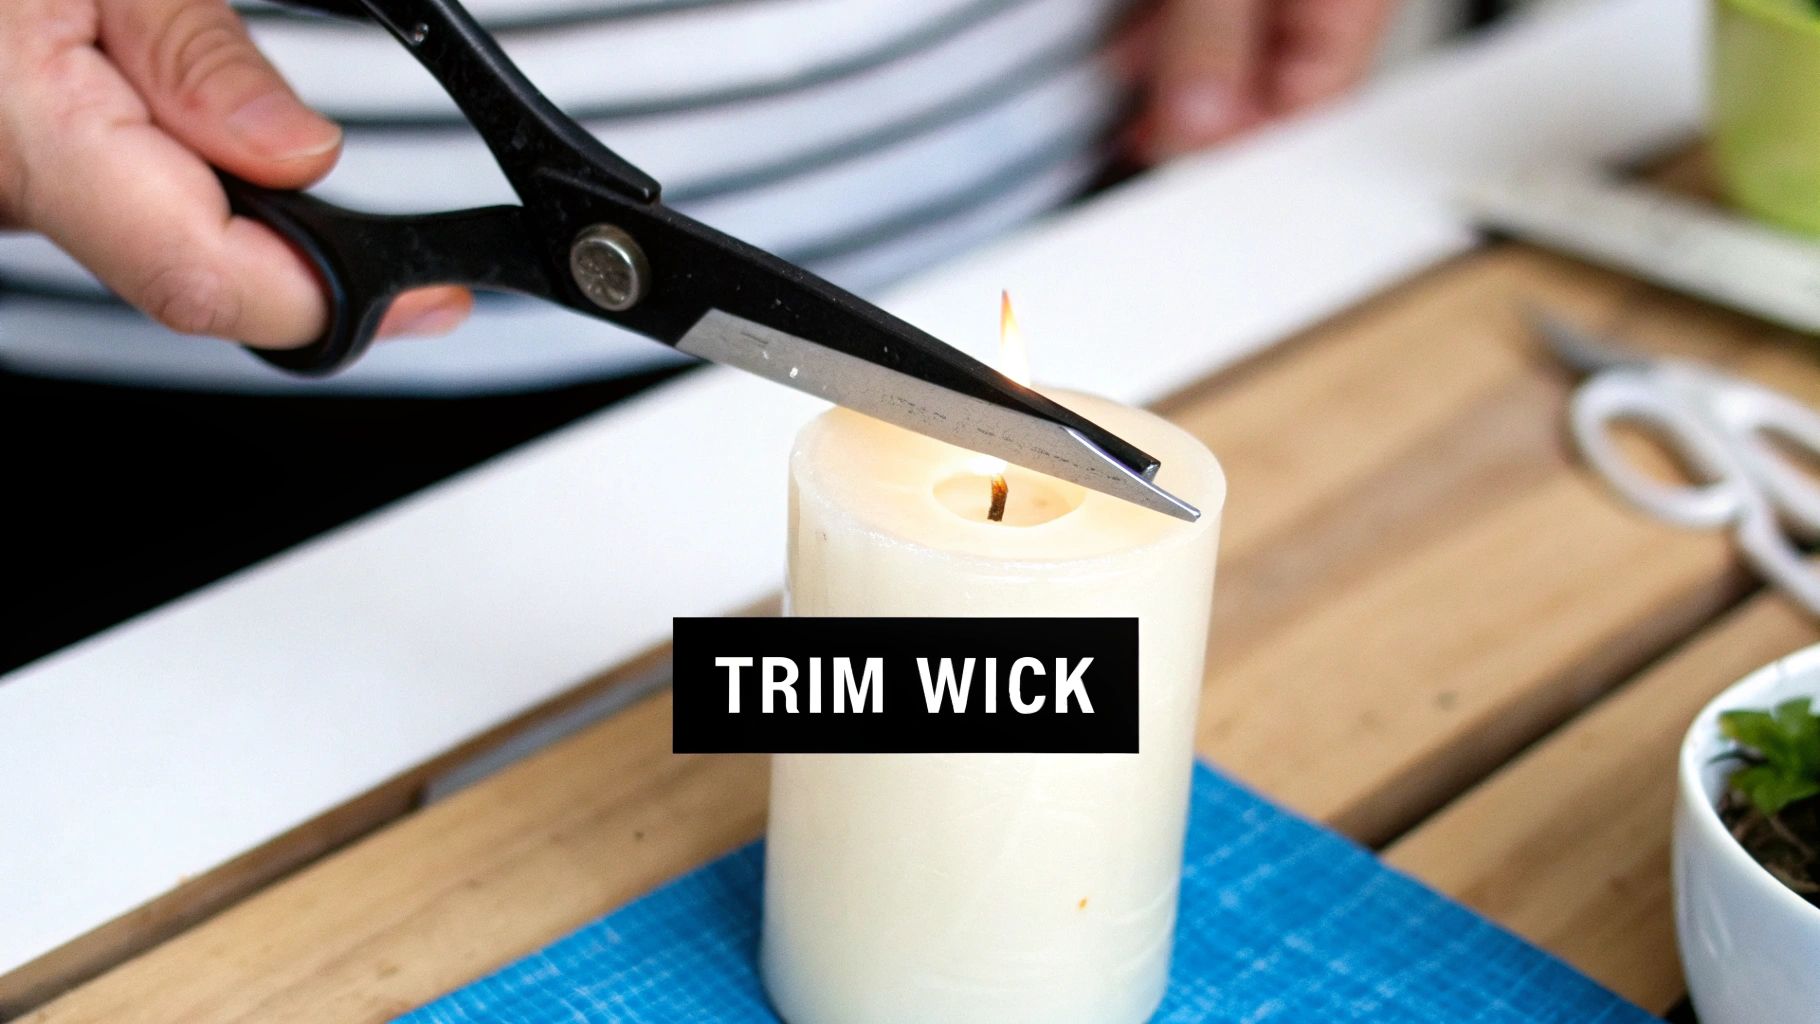
If you've ever spotted those ugly, black soot marks on your candle jars or seen a puff of smoke the moment you light it, the culprit is almost always an untrimmed wick. That little “mushroom” top that forms after a burn is a dead giveaway for carbon buildup, and leaving it there is the fastest way to ruin a perfectly good candle experience.
Learning how to properly burn a candle means making wick trimming a non-negotiable habit. When a wick is too long, it acts like a super-sized straw, pulling up way too much melted wax (fuel) too quickly. This creates a large, unstable flame that dances and flickers wildly, and all that incomplete combustion is what produces the soot and smoke nobody wants.
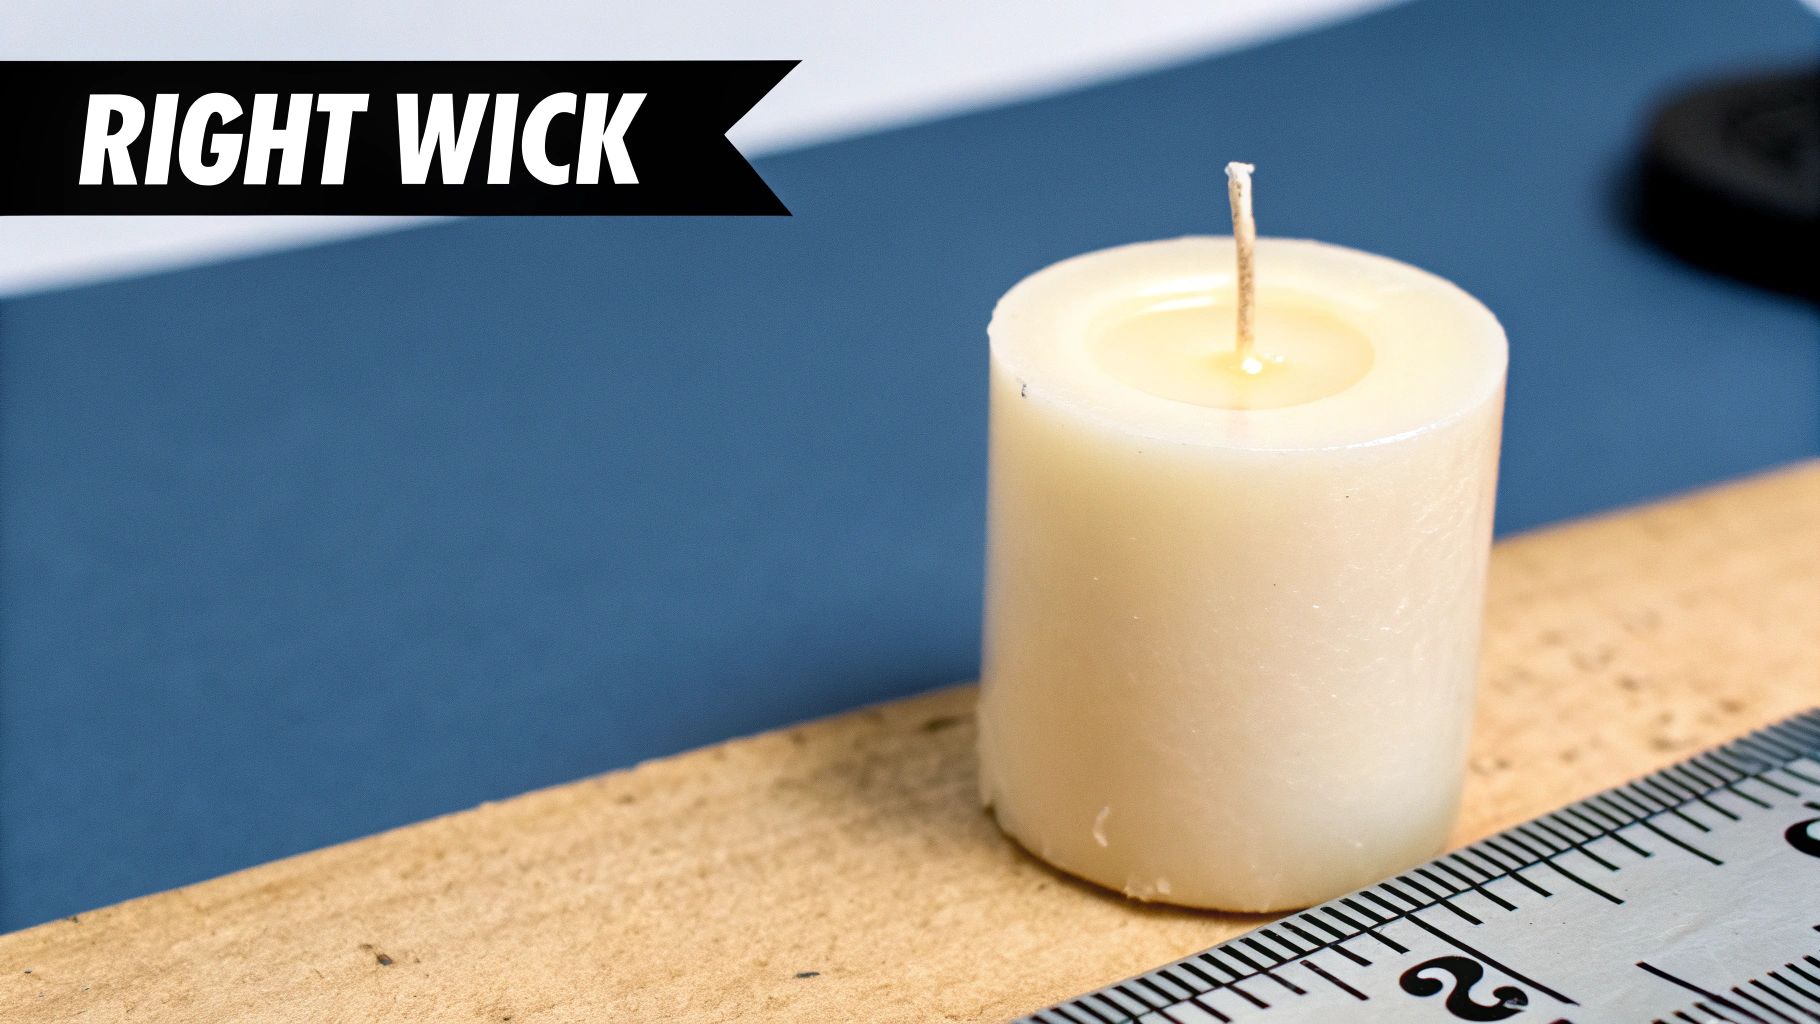
Proper wick care is absolutely critical for a clean burn. Just trim the wick to about 1/4 inch before every single use. This simple step helps you avoid that gross soot and flickering flame, which is better for your air quality and really helps the scent fill the room.
When your wick is trimmed just right, you'll be rewarded with a calm, steady, teardrop-shaped flame. This is your candle's happy place. A calm flame melts the wax pool evenly and releases the fragrance oils consistently, giving you the best scent throw possible.
On the flip side, an untrimmed wick creates a tall, dancing flame that's not only messy but also a potential safety issue.
Keeping your wick trimmed to that perfect 1/4-inch height is the secret to keeping the flame under control. This one small action prevents the jar from getting too hot and dramatically cuts down on the amount of soot that can end up on your walls or in the air you breathe.
You don't need a bunch of fancy equipment to get the job done right. While specialized tools definitely make it easier, you probably have something lying around that will work perfectly.
For more helpful candle care tips and tricks, feel free to explore our other articles on the Jackpot Candles blog. Making this a regular part of your routine is a simple change that makes a huge difference.
A candle’s gentle glow should always be a source of comfort, not concern. We've all been there—you light a beautiful candle, get lost in the moment, and forget the basics. But making a few key safety rules into solid, repeatable habits is what separates a candle lover from a candle expert. It's about creating a safe environment every single time you light that wick.
Your first move should always be to place your candle on a stable, heat-resistant surface. Think of a ceramic coaster, a sturdy decorative tray, or even a thick tile. You absolutely want to avoid placing a burning candle directly on wood furniture, a stack of books, or anywhere near flammable things like curtains or blankets.
Have you ever noticed a candle flame dancing wildly? That's likely a draft. A breeze from an open window, a ceiling fan, or even a busy hallway can cause the flame to flare up, leading to messy, uneven burning and a potential hazard. Always find a cozy, draft-free spot for your candle to live.
It probably goes without saying, but it's critical to keep burning candles well out of reach of curious pets and small children. Their unpredictable movements can easily turn your moment of zen into a dangerous spill.
One of the most important rules I've learned is the "four-hour rule." You should never let a candle burn for more than four hours at a time. This simple step prevents the container from getting dangerously hot, which could cause the glass to crack or the wax to liquefy too quickly.
Every good candle eventually comes to an end. As a strict rule of thumb, you have to stop burning your candle when there's only a half-inch of wax left at the bottom. Pushing it past this point is risky—the direct heat from the flame can put too much stress on the container, and nobody wants shattered glass.
These safety practices aren't just about preventing accidents. They also make your candles last longer and burn cleaner.
For a deeper dive into all things candle care, you should check out our guide on candle safety 101. And because home safety is always a good idea, you can explore this comprehensive guide on how to prevent house fires.
Think of the wax as the very heart of your candle. It’s the fuel that melts down and carries that beautiful fragrance all through your home. Getting a handle on the different types of wax is the secret to burning your candles like a pro and picking one that perfectly matches what you want in terms of scent, lifespan, and even air quality.
You'll mainly run into two big categories: paraffin wax and all the natural waxes. Paraffin, a byproduct of petroleum, is everywhere for a reason—it’s a powerhouse at holding and throwing fragrance. The trade-off? It can sometimes create more soot, that black stuff that can collect on the jar and float into your air.
This is where natural waxes really shine. They've become super popular because they're known for burning much cleaner. This group includes fantastic options like soy, beeswax, and coconut wax, and each one brings something a little different to the table.
The real game-changer is how cleanly the wax burns. Natural waxes like soy or beeswax just tend to burn more evenly and release fewer pollutants than traditional paraffin wax candles. If you peek at candle market trends, you'll see a huge shift in what people want—and it's these cleaner-burning options.
When you choose a candle made from a high-quality natural wax, like the 100% soy wax we pour into every Jackpot Candle, you’re really investing in a better experience. You're getting a candle designed from the ground up for a superior, cleaner, and more fragrant burn from the first light to the very last.
Even when you think you’ve done everything right, candle problems can still pop up. It happens to all of us. Maybe you got distracted and blew it out too soon, or you’ve got a wick that’s decided to go for a swim. Don't throw in the towel just yet—most of these issues are surprisingly easy to fix, and you can almost always rescue your favorite candle.
The biggest culprit I see is tunneling. This is when a stubborn ring of hard wax builds up along the sides of the jar, while the wick just burns a hole straight down the middle. It’s a total waste of good wax and it kills your candle's ability to fill the room with scent. Luckily, the fix is something you probably have in your kitchen right now.
To bring a tunneled candle back from the brink, just grab a sheet of aluminum foil. Wrap it securely around the top of the candle jar, folding it over to create a sort of dome. You’ll want to leave an opening right in the middle, over the flame, to make sure it can still breathe.
Go ahead and light your candle. The foil works its magic by trapping heat and reflecting it back down onto the wax. Give it an hour or two, and you'll see that hard ridge of wax melt away, leaving you with a perfectly smooth, even melt pool. Crisis averted.
This little trick essentially turns your candle jar into a mini-oven. It concentrates the flame's heat right where it's needed most—on that stubborn, stuck-on wax. It’s my go-to rescue mission for any candle that was accidentally put out too early.
Tunneling is the most frequent problem, but a few other frustrating things can happen. Here’s a quick guide to troubleshooting them.
Let's tackle a few more common questions we get from candle lovers just like you. Think of this as your go-to spot for quick fixes and a little more insight into getting the absolute best burn, every single time.
Yes, you absolutely can. A tunneling candle is a pain, but it's definitely not a lost cause. The easiest trick I've found is to make a little "tent" out of aluminum foil. Just wrap it around the top of the candle jar, but make sure to leave an opening over the flame so it can still breathe.
Light the candle and let it do its thing for an hour or two. The foil traps the heat, which melts all that stubborn wax clinging to the sides of the jar. This basically resets the wax memory, evening out the surface for a perfect, clean burn next time.
This is a classic problem, and it usually comes down to a few things. First, take a look at the melt pool. The secret to a strong scent throw is letting that top layer of wax melt completely, all the way to the edges of the jar. If it hasn't, the fragrance oils can't fully release.
Also, think about the room you're in. A small candle is going to have a hard time filling a huge, open-concept living room with its scent. And don't forget about drafts! An open window, a nearby air vent, or even a ceiling fan can whisk that lovely aroma away before you even notice it's there.
It's not just us—people everywhere are getting serious about burning their candles the right way. The global candle market is set to grow big time, with a huge swing towards natural and eco-friendly options. It shows people really care about getting a quality experience. You can check out more cool facts and figures on the candle market over at freeyourself.com.
Definitely not. For the safety of your home and the life of your candle, you should never burn a candle for more than four hours at a time. It’s our golden rule.
Letting a candle burn for too long is asking for trouble. Here’s why:
Stick to that four-hour rule, and you'll get a safe, controlled, and beautifully scented experience every time you light your candle.
Ready to put your new skills to the test with a candle that gives back? Explore the handcrafted, 100% soy wax collection from Jackpot Candles, where a beautiful surprise is waiting inside every one. Find your new favorite candle today!
Comments will be approved before showing up.