
free shipping at $99


You lit a good candle two nights ago. By the second evening the glass is smoked, a ring of hard wax sits around the edge, and the wick looks like a small black mushroom. That is what happens when nobody trims the wick and the flame gets blown out instead of snuffed.
A candle care set is the small kit that stops those three failures. The trimmer sets flame height. The snuffer puts the flame out without a spray of wax. A hook, a tray, a dipper, and a cloth solve narrower problems, and most of them can wait.
I would buy the trimmer and the snuffer before anything else. Each tool below is tied to the burn problem it fixes, and to what the sets on the shelf really contain.
A smoky jar, wax running down one side, and a deep tunnel can all start with a wick left long and curled between burns. The right tool depends on the problem: a trimmer controls the wick, while a snuffer puts out the flame without blowing wax or soot around.
Older wicks needed frequent trimming because they did not burn down evenly. An English polished-steel snuffer in the Science Museum Group collection, dated to the 18th century, combined a cutting blade, a box to catch the hot trimming, and a spike to straighten the wick. The box kept a smoldering tip away from the liquid wax and tabletop. A modern care set applies the same practical idea, though the tools included vary by set.
| Tool | What it does | When you use it | Found in listed sets |
|---|---|---|---|
| Wick trimmer | Cuts the wick to about 6 mm (1/4 inch) | Before every lighting | DECO, Saga, 54 Celsius, Siblings, Yummi |
| Snuffer | Smothers the flame without splatter or smoke | Every time you put the flame out | DECO, 54 Celsius, Siblings, Yummi |
| Wick dipper | Re-centers and coats the wick in liquid wax | Right after snuffing, while the wax is still liquid | None of the listed sets |
| Wick hook | Lifts trimmings and debris out of the wax pool | After trimming, or when a wick falls into the pool | Yummi (8-inch) |
| Tray | Catches trimmings and drips | Under the candle during trimming | Yummi (9-inch) |
| Cleaning cloth | Wipes soot and wax from glass and rim | Between burns | Siblings (Swedish cleaning cloth) |
For routine burning, the wick trimmer and snuffer do the main jobs: trimming reduces the chance of an oversized, smoky flame, and snuffing avoids blowing the flame out. A wick dipper is useful for repositioning and coating a wick after snuffing, but none of the listed sets includes one.
A hook and tray earn their place when trimmings are hard to reach, especially in tall pillars or reveal candles. The hook lifts debris from the wax pool; the tray catches clippings before they fall onto the table. Both help keep fingers away from hot wax. The cloth is optional: use it to wipe soot and wax from the glass and rim between burns, or use a paper towel, keeping it off hot glass.
Practical rule: If a set skips the trimmer or the snuffer, it is décor, not care.
Start with the cheapest two-tool kit if you burn one everyday candle. DECO Raleigh listed a candle care set at $29.50 in 2026, one snuffer and one wick trimmer, which works out to $14.75 a tool. 54 Celsius listed the same pair at $34.00 in 2026, about $17 a tool. You are paying for two pieces of metal you will use on every burn.
| Set | Price | Listed in | Included tools |
|---|---|---|---|
| DECO Raleigh | $29.50 | 2026 | One snuffer, one wick trimmer |
| Saga Candles | $29.90 | 2026 | Wick trimmer and other candle-care tools |
| 54 Celsius | $34.00 | 2026 | One snuffer, one wick trimmer |
| Yummi Candles (four-piece) | $36.00 | 2025 | Snuffer, 7-inch trimmer, 8-inch wick hook, 9-inch tray |
| Siblings | $41.00 (reduced from $46.00) | 2026 | Swedish cleaning cloth, wick trimmer, snuffer |
Saga Candles listed a set at $29.90 in 2026 with a wick trimmer and other candle-care tools. That listing does not name a snuffer, so I would not assume one is in the box. Yummi Candles listed a four-piece set at $36.00 in 2025, with a snuffer, a 7-inch wick trimmer, an 8-inch wick hook, and a 9-inch tray, about $9 a piece. Siblings priced its set at $41.00 in 2026, reduced from $46.00, with a Swedish cleaning cloth, a wick trimmer, and a snuffer, about $13.67 a tool.
For one jar on the coffee table, the two-tool set is enough. You trim, you snuff, you are done. For tall pillars and reveal candles, the hook and tray earn the extra dollars, because a deep pool hides trimmings and a short pair of scissors cannot reach them. The cloth is the piece I would skip until the metal tools are already in the drawer.
None of these five sets includes a wick dipper. Buy one on its own only if you re-center wicks often. Otherwise a cool fingertip, used before you light, does the straightening.
Buy the trimmer and snuffer first. Practice the trim-and-snuff routine on the first candle you own. If you burn hidden-jewelry candles from Jackpot Candles, add the hook and tray before the reveal, not after wax has already buried the piece.
Trimming is the step that sets flame height, soot, and how evenly the wax melts. A warm wick bends under the blades. A cold wick cuts clean.
The short version is four moves. Cool wax, a quarter-inch cut, a clear pool, a centered wick.
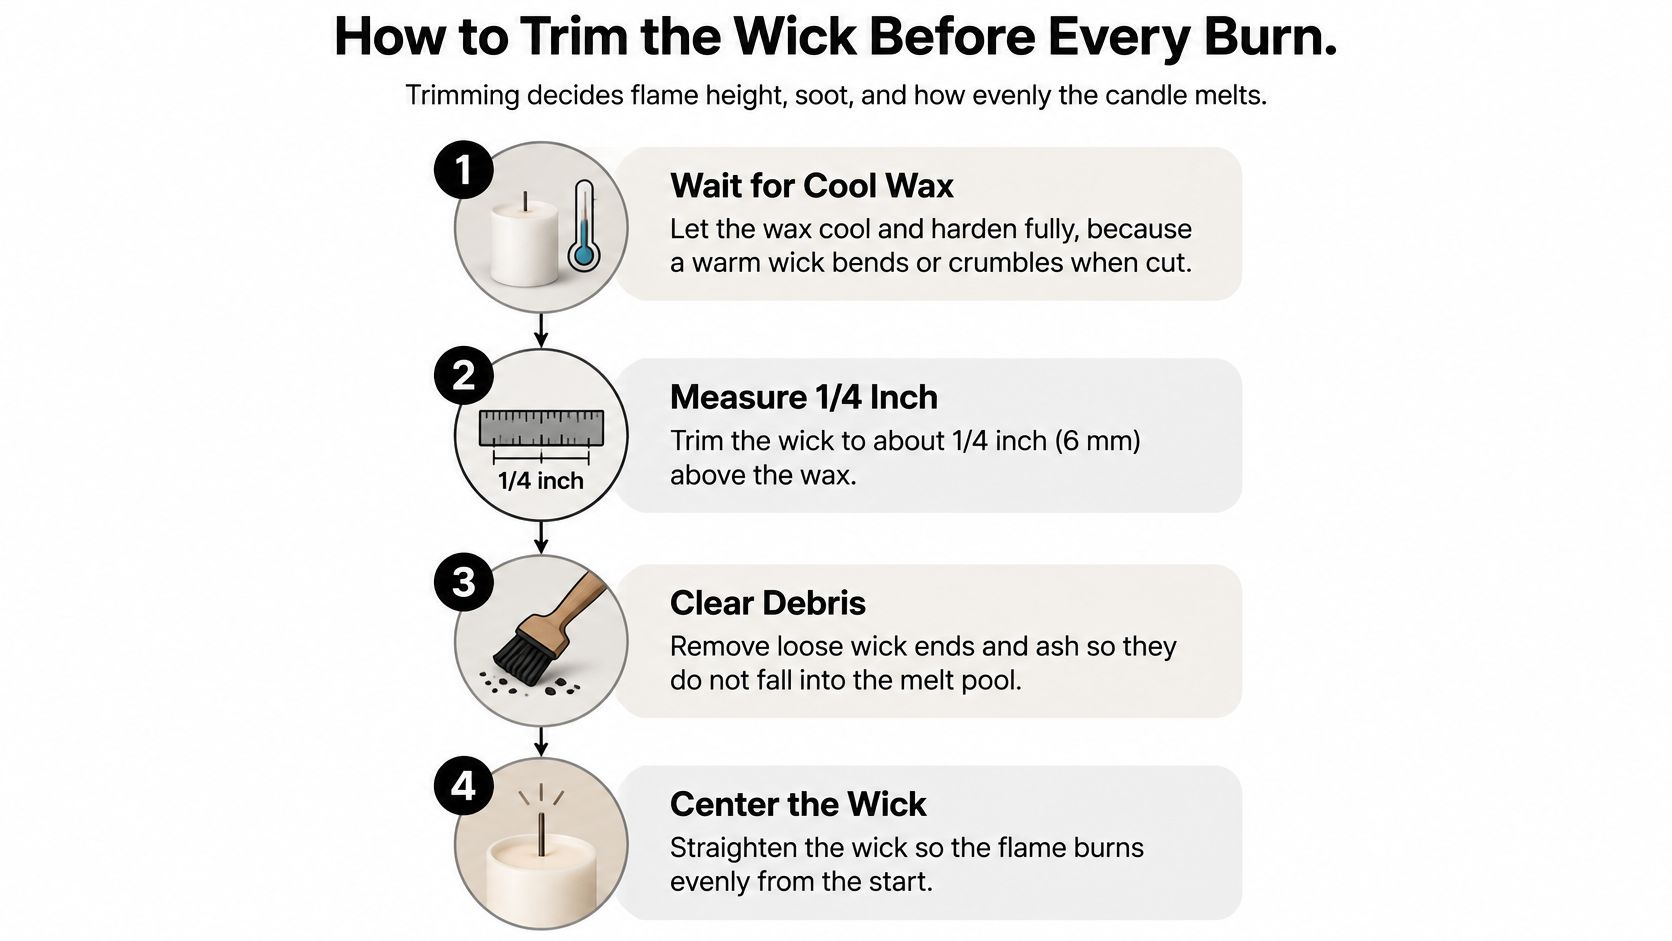
Tall pillars often need a second look after the first hour. The wick can curl once the pool is deep, even if the first cut was clean. A wick cut to a stub can drown in that same pool. Leave enough cotton to stand above the wax, then fix a drowned wick with a hook rather than by digging.
If you want to see the cut in motion, this short clip follows the same order, from a cool surface to a straight wick.
A quick blow can scatter liquid wax and send soot onto the glass. Use a snuffer instead: lower it over the flame to cut off oxygen, hold it briefly, then check that the wick has stopped glowing before leaving the candle.
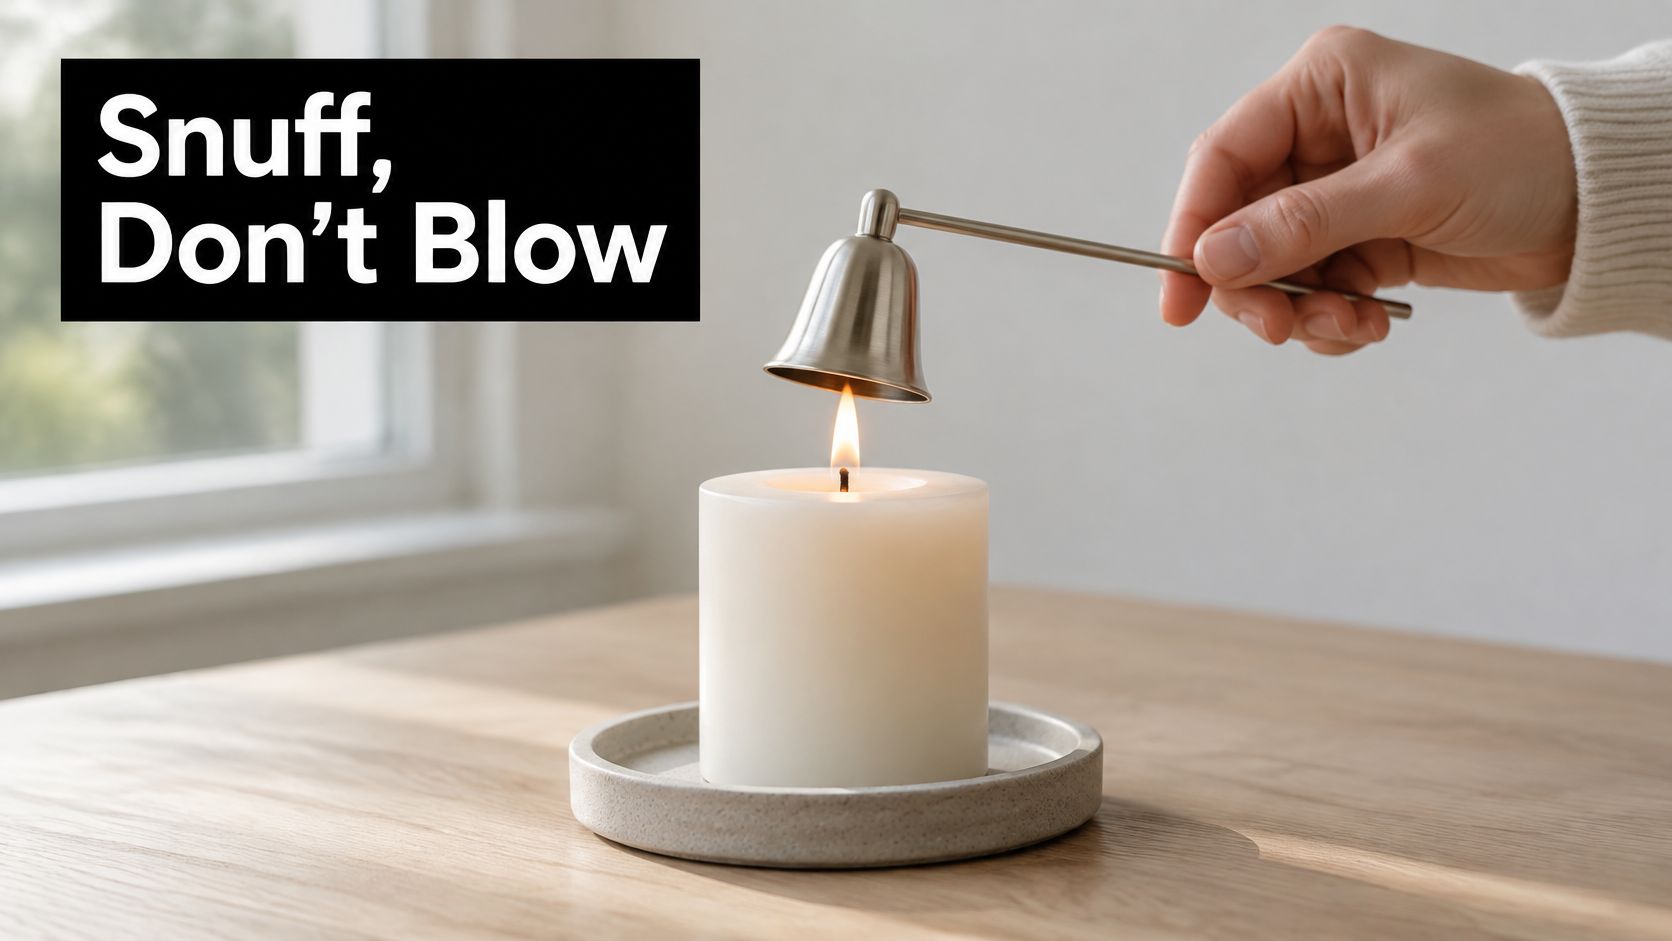
Stop burning if the flame grows unusually high, flickers repeatedly, or climbs toward the rim. Keep children and pets away from the hot vessel. The snuffer stops the flame; the dipper and hook handle the wick and debris, so use each tool only for its job.
The U.S. National Fire Protection Association reports an annual average of 5,894 home-structure fires caused by candles, with approximately 63 civilian deaths, 532 civilian injuries, and $286 million in direct property damage. More than half of those fires begin when something flammable is too close to a flame. 21% involve a candle left unattended, discarded, or otherwise misused, and 36% start in bedrooms. The same fire-safety guidance recommends trimming the wick to about one-quarter inch before burning.
The National Candle Association candle safety tips advise keeping candles well clear of curtains, bedding, books, and other combustibles, and away from drafts, fans, vents, and open windows. Stop burning a container candle when about 13 mm (1/2 inch) of wax remains, to help prevent the vessel and the surface beneath it from overheating. Follow the manufacturer's maximum burn time rather than extending a session. For more on choosing an extinguishing method, see Jade's guide to the best way to put out your candles.
Put the flame out before handling a pouch or capsule, then let the wax and container cool fully. Use clean, long-handled tools, never your fingers, and do not pour hot wax down a drain. Stop burning if the container, wick, or embedded object behaves unexpectedly.
A snuffer can help prevent scorched surfaces and a disturbed melt pool.
The fault I see most often is a black mushroomed wick. That carbon ball on the tip means the wick sat too long across several burns. The flame ate the cotton unevenly and built a cap that smokes, even when the rest of the candle still looks fine.
| Symptom | Likely cause | Fix |
|---|---|---|
| Tall or flaring flame | Wick longer than about 6 mm | Snuff, trim to 6 mm, relight |
| Black soot on the glass | Long wick or a draft from a fan or vent | Trim the wick and move the candle away from airflow |
| Mushroomed black tip | Wick left untrimmed for several burns | Snuff, cut off the carbon tip, relight |
| Tunneling (wax left around the edge) | Short early burns that did not reach the rim | Burn the next session until the full melt pool reaches the edge |
| Wick leans or drowns in the pool | Wick not centered or trimmed too short | Snuff, lift with the hook or re-center with the dipper while wax is liquid |
| Wax runs down the side (guttering) | Flame too large or drafts disturbing the melt | Trim the wick and keep the candle out of drafts |
| Trimmings floating in the pool | Trimmings left after cutting | Lift out with the hook while the wax is liquid |
Each fix is one action you can take the same evening. Snuff first, then cut or lift. Relight only after the wick stands clear of debris.
A tunneled candle often cannot be saved by trimming alone. The first burn has to reach the full width of the vessel, or every later burn follows the same narrow hole. How to prevent candle tunneling walks through that first full-width pool. If you already have a deep well, burn the next session long enough for the liquid wax to touch the glass all the way around, and shield it from fans while you do.
If the wick drowned because you cut it to a stub, snuff, hook it upright while the wax is liquid, and only then relight. Do not add a second wick, and do not dig the wax out while it is hot.
"Soy burns cleaner" is the line that gets people into trouble. Wax type is not a safety ranking. Fragrance, wick, and how long you leave the flame going change what leaves the candle. A smaller flame is not proof the air is fine.
A 2025 peer-reviewed study found that scented-candle burning significantly increased indoor particulate matter and altered airborne microbial communities. Under the study conditions, peak concentrations reached 2.01 mg/m³ for PM2.5 and 3.44 mg/m³ for PM10, exceeding cited Korean 24-hour indoor-air guidelines.
If you want a reading rather than a guess, an EcoQuest Purifiers air quality monitor shows particulate levels while the candle is lit, so you can end the session when the room says stop.
Store candles upright, dry, and out of heat and direct sun. A candle left on a sunny sill softens, leans, and then burns off-center. Let the wax cool fully between lights so the next trim cuts a firm wick. Once the wax looks unstable, or the container is nearly empty, stop. Match the session to the room and the people in it, not to how long you want the scent to hang around. If the glass is already black, how to keep a candle from smoking is the next read.
The burn ends when the room has had enough, not when the fragrance is gone.
Jackpot Candles pours scented soy-blend candles with a piece of jewelry hidden inside, so the burn has a finish line that is easy to rush. Use a trimmer and a snuffer the same way you would on any jar, and take the piece out only after the wax is cold. Visit Jackpot Candles when you want a candle that pairs a careful burn with a hidden find.
Comments will be approved before showing up.